Showing posts with label KIDS. Show all posts

28 February 2013

Mr. White and Mr. White Jr.

Se ha hecho esperar este año, pero al final ha llegado. Habíamos tenido alguna que otra nevada tímida, que dejaba todo el paisaje blanco, pero con una capa tan sumamente delgada que apenas daba ni para hacer una pequeña bola.

Pero esta vez sí, ha nevado de verdad, de verdad de la buena. Porque tenemos nieve para dar y tomar. Tanto que hoy casi no podemos entrar con el coche al llegar a casa. Me ha tocado coger la pala y apartar la nieve para evitar que las ruedas patinasen. Esa es la parte mala, tener que salir de casa con este tiempo. La parte buena, pasar la tarde disfrutando de la nieve. Una batalla de bolas de nieve, un dibujo aquí y allá y, por supuesto, un muñeco de nieve.... o dos.

Los niños han sido los encargados de los muñecos, y les han puesto nombre. Son el Señor Blanco y el Señor Blanco Junior. Idea suya. Me hace gracia eso de "Junior" :)


We've been waiting for it for a long time and it finally arrived. We already had some snow a few times this winter. However, it was not enough to even have a small snowball.

This time it's been a heavy snowfall. Now we have quite a few centimeters of snow. So much that we had some problems to arrive at home today. I had to shovel the snow away from the entrance because it was to slippery for the car. So, that's the bad part. The nice one is to enjoy the afternoon playing outside with the snow. Throwing snowballs, drawing in the snow here and there and, of course, a snowman... or two.

The kids were in charge of the snowmen. They named them as Mr. White and Mr. White Jr. Their very own idea. I like the "Jr." for the little one :)

Pin It

9 September 2012

One for my niece

Prometí a mi sobrina que le haría una banderola como regalo de cumpleaños. Y se ha hecho esperar. Pero ya está terminada, lista para que la cuelgue en su habitación. Como se suele decir, más vale tarde que nunca.

Ya que su color preferido es el malva, ése es el color predominante, que he combinado con naranja y algún azul. Colores pastel que le dan un aire romántico, no os parece?


I promised my little niece to make her a bunting garland as a birthday present. Time flies and she's been waiting for it too long time. Anyway, as we use to say, it is better later than never. And, here it is, ready to be used at her bedroom.

Since her favorite color is purple this is the one I chose as main color, combined with orange and a little bit of blue.

Pin It

10 July 2012

Crafting with kids


Por fin llegó el verano. Y con él las vacaciones de los niños. Por una temporada decimos adiós a los madrugones del colegio (con qué ganas lo estaba esperando) y damos la bienvenida a los días sin horarios, sin prisas. Pero que también vienen acompañados de las temidas frases "me aburro...", "no sé qué hacer...", que siempre, siempre, se acaban repitiendo. Así que hay que darle a la cabecita para idear entretenimientos varios. Os dejo unas ideas para esos días tontorrones, que nosotros ya hemos puesto en práctica.


Summer is finally here, as well as school vacation. We will say good bye to the wake up call for some weeks (I was really looking forward to that, by the way) and we say hello to long lasting days, with no timetable. Those days which come together with certain phrases, such as "I am boring..." "What can I do?...". So you need to think a bit and come up with different ideas to keep your kids entertained. Here I give you some ideas for those situations, which I can tell you, we have already practiced.


Marionetas con calcetines/ socks puppets
Nada más fácil como sacrificar un calcetín y convertirlo en marioneta. Aparte de ser ideal para dar salida a esos calcetines que se van quedando desparejados y da pena tirar, da mucho juego y les entretiene durante un buen rato. Sobre todo a la hora de colocar los pelitos de lana.

Nothing easier than using old socks to create some marionettes. Apart from being quite useful to make use of unpaired socks, they are funny to make and will keep your kids busy for some time, specially while attaching the hair.


Casitas de cartón / Cardboard Little houses
Aprovechando una cajita de cartón podemos hacer unas casitas preciosas con sólo forrarlas de papeles de colores. La que hemos usado nosotros es una de té. Seguro que unas cuantas, de diferentes tamaños y colores, quedan chulísimas como decoración.

Using empty cardboard boxes you can create really nice little houses, with just a few decorated papers. We have used a tea box, for example. Definitely you can get a very nice village making several ones in different sizes and colors.


Pin It

27 May 2012

Welcome to my new little house!


¡Bienvenidos a mi nueva casita! Un nuevo modelo de bolso casita, hecho a medida. Me pidieron que tuviese tejado a dos aguas y la cremallera por detrás. Y aquí está, un bolso en tonos rojos y verdes, con su tejado, chimenea, puertas y ventanas. La puerta es, de nuevo, un pequeño bolsillo. El asa bicolor, ajustable, y de largo suficiente para que lo pueda usar también un mayor. Por si alguien se anima ;)


A mi hija le ha encantado. Tanto, que se prestó voluntaria sin poner ninguna pega a la sesión de fotos. Se merecer que le haga uno, ya me lo ha pedido varias veces. En cuanto tenga algo de tiempo.

Este bolso va con su monedero a juego y, como no podía faltar, también con un broche en forma de nube.


Welcome to my new little house! Another version of the Little House bag, made to order. It had to be with this kind of roof and the zipper at the back. So here it goes, a nice bag in red and green colors, with a roof, chimney, windows and door, which is, again, a little pocket. The strap is bicolor, adjustable, and long enough to be used by an adult, in case somebody is tempted to do so ;)


My daughter loves it. So much that she volunteered to participate in the photo session. She deserves one for herself. As soon as I have some spare time.


This bag comes together with a coordinated little house wallet and, of course, with a cloud brooch.


Pin It

22 May 2012

On its way

Está claro que el producto estrella de la temporada son las casitas, en sus diferentes versiones. Aparte del pedido para el museo Thyssen me han ido llegando otros pedidos para bolsos, monederos y algún que otro móvil. Como éste, que va a cruzar el charco y viaja a Dallas. Hacia allí va ahora mismo, bien protegido en su cajita.


There is no doubt that the best seller of the season are the little houses, in the different versions. Apart from the custom order for the Thyssen Museum some other requests have been arriving to Marabara, little houses bags, wallets and mobiles. Like this one, which is now flying to Dallas, well protected inside this nice box.


Pin It

17 February 2012

Easy costume

Last year I discovered this bat costume through Blog Holamama. Unfortunately I couldn't convince my daughter to go for it. I must have insisted so much that she still remembered it one year later... and was willing to give it a try this time. It is maybe more appropriate for Halloween but, who cares, a costume is a costume all the time, so why not using it for carnival?

As I guessed the costume is very, very easy to make. I can tell you that it took less than an hour to have it ready. I think I invested more time looking for the leggings than making the wings, which is the main part of this costume.
All you need is a black (or brown) t-shirt, brown or black leggings and a piece of cotton fabric in the same color range (I had black at home so that is what I used). We also made the ears, using black card stock and a headband.

The photos are not that good and the wings are already a bit wrinkled. But considering that I had to take them after the carnival party I think the costume behaved quite well. It survived the whole morning!

If you need to make an easy costume, this is the one. A different issue is how long it will take you to convince your kids to wear it... It took me one year ;)


El año pasado descubrí este disfraz de murciélago a través del Blog Holamama. Muy a mi pesar no hubo manera de convencer a mi hija de que fuese disfrazada de ese curioso animalillo. Debí insistir mucho, muchísimo diría yo, porque ella todavía se acordaba del disfraz después de un año entero. Y esta vez sí le apetecía probarlo. Es más bien un disfraz de Halloween, pero para carnaval también sirve, ¿por qué no?. Un disfraz es un disfraz en cualquier época del año.


Como yo suponía, es muy, muy fácil de hacer. Os puedo asegurar que no tardé ni una hora en tenerlo listo. Creo que he tardado más en encontrar las mallas que en hacer las alas, que es la parte principal.
Solamente necesitáis una camiseta marrón, unas mallas marrones (o negras, que es lo que he encontrado yo) y un trozo de tela de algodón también en el mismo color (yo tenía negro en casa y con eso me he apañado). Para completar el conjunto hemos hecho unas orejitas, con una cartulina negra, que hemos pegado a una diadema.


Las fotos no son muy buenas y las alas están ya un poco arrugadas. Pero considerando que las he tenido que hacer después de la fiesta de carnaval, creo que ha aguantado muy bien el trote. Lo que no ha sobrevivido es la diadema, pero las alitas siguen donde yo las cosí :)


Si en alguna ocasión necesitáis hacer un disfraz sencillo, sin duda éste cumple el requisito. Otra cosa es cuánto tiempo tardéis en convencer a vuestros hijos... A mi me ha costado un año ;)

Pin It

15 January 2012

Let the sun shine!

Here it comes the last project I've been working on, which I started during Christmas and managed to finish a couple of days ago. It is a nice and colorful rug, to be used at bed's side, for example. Another idea would be to use it in your hall. It won´t be unnoticed, for sure!


It is made from a cotton canvas and different prints in the shape of a happy sun. It is padded to make it more comfortable. Furthermore it is reversible so you won't need to wash it so often, which is always welcome, isn't it?
The rug is coming with a nonslip base to avoid any accident.

Of course, it can be customized to suit your personal taste and match your room decor.

You can find this rug here. Remember that you can get 20% off using coupon code SALES2012.


Hoy os dejo unas fotos del último proyecto en el que he estado trabajando, que empecé estas Navidades y he terminado hace un par de días. Es una alfombrita muy colorida, para poner a los pies de la cama, o en medio de la habitación, donde más te guste. También se me ocurre que podría quedar muy bien en el recibidor, seguro que llama la atención de cualquier visita.


Está confeccionada con loneta en la parte central y diferentes estampados de algodón formando los rayos. Lleva una capa de guata para que sea mullidita. Además es reversible, con lo que tendrás que mandarla a la lavadora menos veces, que siempre se agradece... ;)


Se entrega acompañada de una base antideslizante para que no haya accidentes indeseados. Y, por supuesto, se puede hacer en multitud de combinaciones para adaptarla a cualquier rincón y gustos del dueño.


Puedes encontrar esta alfombra aquí. Recuerda que tienes un 20% de descuento con el código SALES2012.

4 January 2012

The second little bird

Here it comes the second little bird. More will come soon, I am running out of wooden rings.


Y aquí os presento al segundo pajarillo móvil. Habrá más pronto, apenas me quedan aros de madera. Toca salir de compras.

3 January 2012

Little bird

New Year, new creations!
After releasing all the Christmas orders I finally had time to work on some projects, which were waiting for me, patiently. By the way, thanks to all who ordered their Christmas presents to Marabara!!! It was a pleasure!! :)

Coming back to the forgotten projects. I made quite a few little birds long time ago. I think it was back in summer... uf, time flies!
The fact is that all those birds were stored in my atelier and nothing else happened. Until yesterday, when I took them out of the box and started working on them again.
From the beginning I planned to use them for mobiles. And this is the result, a nice mobile, with a little bird, embellished with some felt leaves.

I love how it turned out. What do you think?


Como se suele decir Año nuevo, vida nueva. En mi caso lo he adaptado a Año nuevo, proyecto nuevo!
Después de terminar con los pedidos navideños he tenido tiempo para ponerme con algunas cosillas que tenía aparcadas desde hace un tiempo. Por cierto, muchas gracias a todos los que habéis confiado los regalos de Navidad a Marabara!!! Ha sido todo un placer!! :)

El caso es que tenía unos pajaritos de tela hechos desde hace unos meses. Creo que incluso los hice en verano... el tiempo vuela! Y los pobres estaban almacenados en mi taller, esperando su momento... que llegó ayer. Me acordé de ellos, los saqué y me puse a trabajar. Desde el principio mi idea era usarlos en móviles decorativos y eso es lo que he hecho. El resultado es un precioso móvil, con un pajarillo posado en un aro de madera y adornado con unas cuantas hojas de fieltro en diferentes tonos de verde.

A mi me gusta mucho el resultado. Y a vosotros?

12 December 2011

The little house and the palace

The little house:


...and the palace:


A couple of weeks ago I received a custom order to create a handbag in the form of a house, similar to my little house wallets. After some brainstorming and drawings, this house was "built". It was a pleasure to work on this order, I had so much fun! I had been thinking for a while to make something similar, however I never had the time, or I thought I hadn't. I guess I simply needed that little gentle prod to do it.

Some notes about this handbag. The front door is a pocket. The roof closes with a zipper. I used the chimney to attach the two-color strap, which is also adjustable so that it can be used by kids and, why not, big ones as well ;)

Since this handbag is for a little girl I asked my daughter and her feedback was fantastic, she wants one as well!

In a few days I will show you some other details from this bag, which I do not want to reveal right now. Psst... it is a surprise...

La casita...  y el palacio:


Hace un par de semanas recibí un pedido muy especial, hacer un bolso con forma de casita, similar a las que hago como monederos. Después de intercambiar unas ideas y algún dibujo he "construído" esta casa. Ha sido un verdadero gusto trabajar en este pedido, me lo he pasado en grande! Llevaba algún tiempo pensando en hacer algo similar, pero nunca tenía tiempo, o pensaba que no lo tenía. Supongo que necesitaba ese pequeño empujoncito para empezar.


Algunos detalles sobre el bolso... La puerta se ha convertido en bolsillo, para así poder llevar algunas cosas pequeñas. El tejado cierra con una cremallera. He aprovechado la chimenea para enganchar ahí el asa, que es bicolor y ajustable, pensada para que puedan usar el bolso los más pequeños de la casa y, por qué no, los no tan pequeños también.


Como el bolso es para una niña pequeña he preguntado a mi hija su opinión y su respuesta no podía ser mejor, quiere uno también!
Y, por supuesto, ha sido mi pequeña modelo :). Así, tal cual, natural, según venía del cole, en chandal y con lamparones.


Dentro de unos días os daré algún que otro detallito más del bolso, que ahora no quiero revelar. Psst... es sorpresa...

7 September 2011

Back in stock

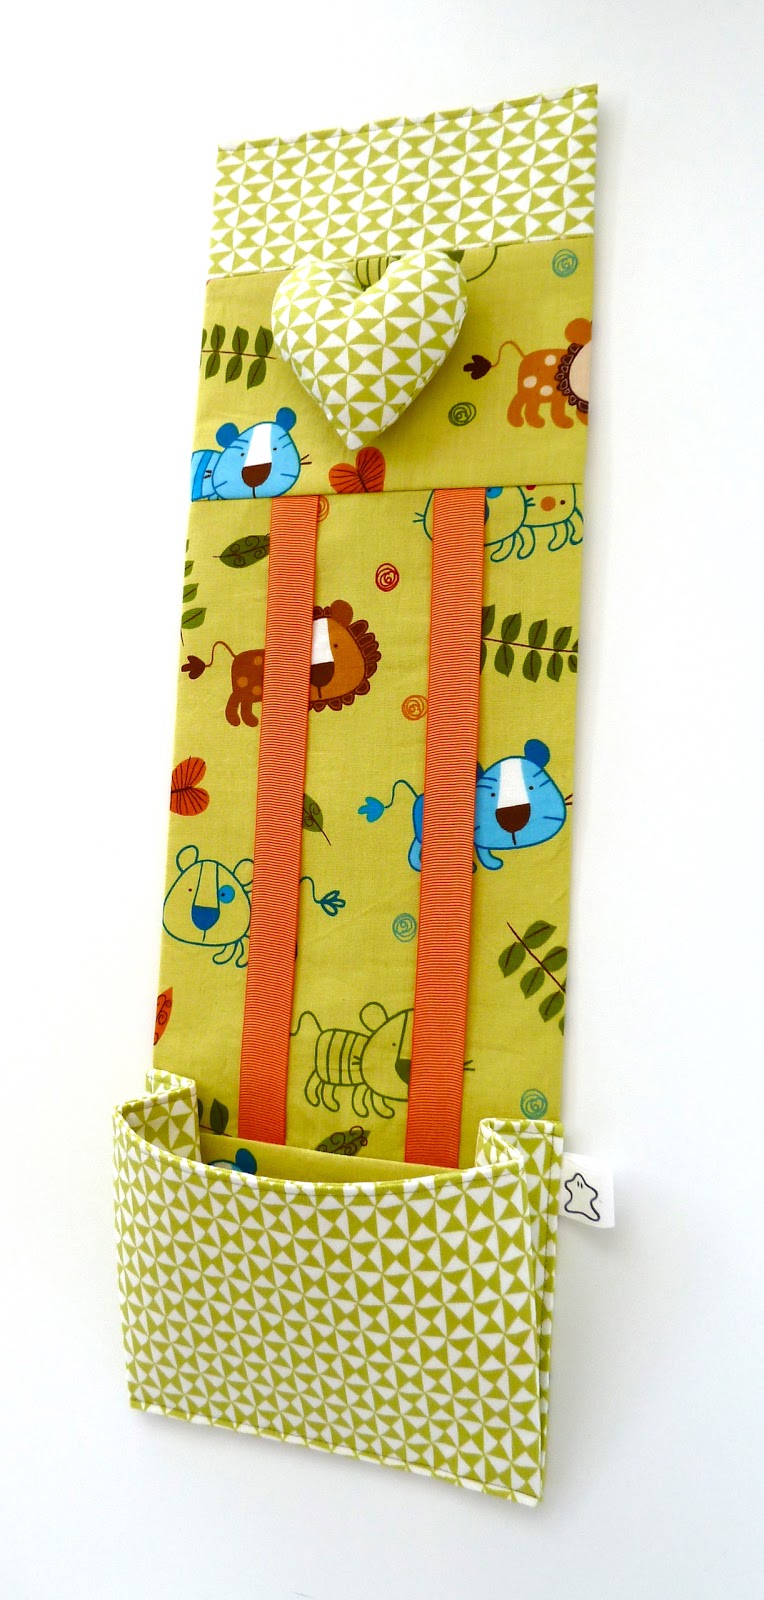
During the last days I have been busy working, among other things, on more hairclip organizers. Some of the most requested prints are now back in stock plus a new one, which I love!
For this new organizer I selected a very nice fabric, featuring adorable jungle friends on a green background.


Then, I have made a new version of the Aqua flowers, using a different coordinated print. I like how it turned out, combining flowers with a geometric design.


And, finally, I have repeated the Butterflies organizer.


I still need to insert the grommets. Once ready they will be available in the shop.


Durante estos últimos días he estado ocupada, entre otras cosas, haciendo unos cuantos organizadores de horquillas. Hacía ya tiempo que no me ponía con ellos. He repetido algunos de los estampados más demandados mas uno nuevo, que me encanta!
Para este nuevo organizador he elegido una tela muy chula, con unos simpáticos animales de la selva, sobre fondo verde.


Entre los repes, por ejemplo, he vuelto a hacer el Aqua flowers, aunque variando el coordinado. Me gusta mucho como ha quedado la combinación del estampado de flores con el motivo geométrico.


Y, finalmente, el organizador Butterflies.


Todavía me queda poner los ojetes. Una vez listos los subiré a la tienda.

2 September 2011

I found it!

Finally I found the solution for the mobile that I was preparing a few weeks ago. I wanted to use a wooden hoop but did not know where to find it.
As it usually happens you find the solution when least expected. In my last visit to Pontejos, my usual provider of thread, zippers, etc.. I saw an embroidery frame and thought it could be perfect to serve my purpose. I did not think twice and bought one to try it.

Here it is, the finished mobile, with the little houses hanging from the wooden hoop, which is exactly what I had in mind. Thus, I am very, very happy!


Al final he encontrado la solución para el móvil que empecé a preparar hace unas semanas. Quería usar un aro de madera pero no tenía ni idea de donde encontrar uno.
Como suele ocurrir, cuando menos te lo esperas das con la solución. En mi última visita a Pontejos, mi suministrador principal de hilo, cremalleras, etc... (soy cliente habitual ya) vi un aro para bordar, que pensé podría servirme para el móvil. No me lo pensé dos veces y compré uno para probar.


Y aquí está, el móvil terminado, con sus casitas colgando del aro de madera, que es exactamente lo que yo tenía en mente. Así que estoy la mar de contenta!


27 August 2011

Something different

I started the weekend making something completely different to my usual creations. It is not a bag, neither a  pouch nor a wallet. It is a bunny, a very sweet bunny, cuddly and soft.


I had this idea in mind for quite some time but never put it into practice. Yesterday evening I finally did it!

This one will be for my daughter (she does not know yet... ). Let's say that she will be running the testing phase. Even though she is not a baby (that period was over some years ago already, time flies...) she will love it and, for sure, the bunny will be hugged hundred times, stretched another hundred times, stepped on, etc, etc... enough to check if the bunny survives a kid.
Have you seen those IKEA cabinets where a drawer is open an closed, open and closed... thousand times? Something similar ;)


He empezado el fin de semana haciendo algo totalmente distinto a lo que suelo hacer. No es un bolso, ni un neceser, ni tampoco un monedero. Es un conejo, un dulce conejito, muy achuchable y blandito.

Llevaba ya tiempo con ganas de hacer un muñeco de este estilo pero nunca me había llegado a poner en serio con ello. Y ayer por la noche lo hice!


Este se lo voy a regalar a mi hija (no lo sabe todavía...). Digamos que ella va a ser la que se encargue de la fase de pruebas y el control de calidad. Aunque ya no es un bebé (hace ya unos años que dejó de serlo, cómo pasa el tiempo...), seguro que le encanta y, segurísimo, que le abrazará y achuchará cien veces, estirará y maltratará otras tantas, lo pisará , etc, etc... lo suficiente para ver si el conejito es capaz de sobrevivir a un niño.
Habéis visto en IKEA esas vitrinas donde muestran las pruebas de resistencia de sus productos, con un cajón abriendo y cerrando, abriendo y cerrando permanentemente? Pues algo parecido ;)

22 July 2011

My little village

I keep playing with different designs of wallets. They are the perfect project to combine with some others, more complicated.
After making some little bugs, like the ladybird and the bee, I have tried a completely different model, these lovely little houses.

So far I have made two of them but I can assure you that I will create some more, many more, I love them!
So I may end up building a whole village :)

It was also a lot fun to take the photos. My daughter helped me to arrange the Playmobil figures around the houses. It was great!


The house is made from different cotton fabrics to create the door, windows and roof. The zipper is in the back of the house and the wallet is fully lined with a black on white fabric.


Sigo probando diferentes modelos de monederos. Son los proyectos perfectos para combinar con otros más complicados.
Después de hacer unos cuantos bichos, como la mariquita y la abeja, he intentado un diseño totalmente diferente, estas casitas tan chulas.

Ya llevo dos pero seguiré haciendo más, muuuchas más, me encantan! Así que quizá acabe teniendo una ciudad completa :)


También me lo he pasado genial haciendo las fotos. Mi hija me ha ayudado a colocar todos los Playmobil alrededor de las casas y crear la escena. Ha sido divertidísimo!


Las casitas están confeccionadas con diferentes telas, una lisa para la parte principal y otras estampadas para crear la puerta, ventanas y tejado.
La cremallera está en la parte trasera y el monedero está totalmente forrado con una tela de letras negras sobre fondo blanco.

Pin It
Related Posts Plugin for WordPress, Blogger...