Showing posts with label CRAFTS. Show all posts

23 May 2013

Aquí no se tira nada

...y menos las telas. Soy incapaz de tirar el más mínimo pedacito de tela a la basura. Me da una pena tremenda. Así que les voy buscando usos, porque tampoco es plan de acumular y acumular porque sí.

El último ejercicio de reciclaje es éste, un adorno en forma de banderola para los envoltorios. Con un papel de seda de fondo, destaca mucho el colorido de las banderitas y queda requetebonito. Además, lo puedes reusar para decorar algún rincón de tu casa. ¿Qué más se puede pedir?


I cannot through any piece of fabric to the trash, absolutely none of them, even the smallest one. So I keep thinking to find different ways of using them, so I do not end up with a pile of tiny scraps.

The last idea I had is this one, a little bunting to embellish my packaging. Using a white tissue paper at the back, the colors will stand up. I really love it! Furthermore, you can use the garland later on at your home. Isn't it lovely?

Pin It

29 December 2012

Pop-up card

Ahora que la mayoría de pedidos ya han llegado a su destino os puedo enseñar la tarjeta de felicitación que incluí en uno de ellos. No era un regalo de Navidad, sino de cumpleaños, por lo que me pareció una buena idea el hacer una tarjeta un tanto especial. Había visto unas cuantas tarjetas desplegables por la red, principalmente en Pinterest (qué gran fuente de inspiración!), así que me animé a intentarlo.

Cómo no, tenía que llevar una casita :), que junto con un árbol y una pequeña nube completaron la escena perfecta. La casita la hice con mini retales, pegados sobre cartulina. Y quedó de lo más mono, no os parece?


Now that most of the orders have reached their destinations I can show you the greeting card that goes with one of them. It wasn't a Christmas present but a birthday one so I thought it would be nice to include a special card. I've seen different pop-up cards in the internet, mainly in Pinteres (what a great source of inspiration!) so I decided to give it a try.

Obviously a little house had to be there, which, together with a tree and a tiny cloud, were the perfect scenario. The little house is made of very tiny fabric scraps, glued on cardboard. I think the result is pretty nice, don't you think so?

Pin It

14 September 2012

Packaging ideas - Ideas de envoltorios

De vez en cuando os voy enseñando alguno de los envoltorios que hago para los envíos de Marabara. Así que he pensado que estaría bien recopilar unas cuantas de esas ideas en una sola entrada.

Hay mil formas de envolver regalos, envíos, paquetes en general. Y lo mejor, al menos para mi, es ir jugando con diferentes materiales y colores. Así no te cansas nunca y te van surgiendo nuevas ideas.

Las cajitas y sobres pequeños son hechos por mi. Muchas veces no encuentras las medidas que necesitas, o los colores. También es una buena manera de usar restos de material que te haya sobrado de algún otro proyecto. Ya sabéis que no tiro nada ;). Dentro de poco pondré algún tutorial con el paso a paso, porque es bien sencillo y los envoltorios quedan genial.

¡Espero que os guste y os sirva de inspiración!


Con sobres o papel


From time to time I publish some photos of the packaging I am using for Marabara's deliveries. So I thought it could be a good idea to compile some of those ideas into a single post.

There are many possibilities to package your presents or orders. You can play and have a lot of fun combining different materials and colors. That way your packages will not be boring and you will get new ideas every time.

The little boxes and small Kraft envelopes are DIY. Many times you cannot find the right size or the color you were looking for. A good alternative is to do it yourself, and you will have the possibility to use some scraps from other projects.

I hope you like it and find some inspiration!

Pin It

18 August 2012

DIY: friendship bracelets

¿Quién no ha hecho una pulsera de nudos, o macramé, alguna vez en su vida? Yo creo que casi todos. Pues después de tantos años sin acordarme de ellas, de repente, este verano las he visto por todas partes. En revistas de manualidades, en blogs... por todos sitios, ya os digo.

Así que al final me entraron ganas de hacer una yo también. Pensé que sería fácil, de estas cosas que nunca se olvidan, como montar en bici. Y mira tú por donde no fue así, me hice un lío monumental con los nudos. En estos casos lo mejor es tirar de tutorial y arreglado. Yo seguí este de PurlBee, que está fenomenal. Y una vez le coges de nuevo el truco va corrido.

http://www.purlbee.com/friendship-bracelets/

Os dejo una foto de la mía, en tonos turquesa, que para eso es mi color preferido. Seguro que haré más porque son muy divertidas. ¿Os animáis vosotros también? Si es así quiero ver vuestras pulseras :)


Is there anyone out there who never made a friendship bracelet? I guess not. They were quite famous some years back. I did not even remember them. And, suddenly, this summer I've seen them everywhere. In crafts magazines, in blogs... I tell you, everywhere!

So I couldn't help but making one for myself. I thought it would be really easy. One of those things you never forget about, like biking. I am afraid I was totally wrong and had serious problems with the knots. The solution was easy, I followed this tutorial from PurlBee, which is really good, and problem solved! 


This is the photo of my bracelet, in turquoise tones, as it is my favorite color. I think I'll be making some more, they are so fun. Will you make one as well? If so, I'd like to see the pictures :)

Pin It

10 July 2012

Crafting with kids


Por fin llegó el verano. Y con él las vacaciones de los niños. Por una temporada decimos adiós a los madrugones del colegio (con qué ganas lo estaba esperando) y damos la bienvenida a los días sin horarios, sin prisas. Pero que también vienen acompañados de las temidas frases "me aburro...", "no sé qué hacer...", que siempre, siempre, se acaban repitiendo. Así que hay que darle a la cabecita para idear entretenimientos varios. Os dejo unas ideas para esos días tontorrones, que nosotros ya hemos puesto en práctica.


Summer is finally here, as well as school vacation. We will say good bye to the wake up call for some weeks (I was really looking forward to that, by the way) and we say hello to long lasting days, with no timetable. Those days which come together with certain phrases, such as "I am boring..." "What can I do?...". So you need to think a bit and come up with different ideas to keep your kids entertained. Here I give you some ideas for those situations, which I can tell you, we have already practiced.


Marionetas con calcetines/ socks puppets
Nada más fácil como sacrificar un calcetín y convertirlo en marioneta. Aparte de ser ideal para dar salida a esos calcetines que se van quedando desparejados y da pena tirar, da mucho juego y les entretiene durante un buen rato. Sobre todo a la hora de colocar los pelitos de lana.

Nothing easier than using old socks to create some marionettes. Apart from being quite useful to make use of unpaired socks, they are funny to make and will keep your kids busy for some time, specially while attaching the hair.


Casitas de cartón / Cardboard Little houses
Aprovechando una cajita de cartón podemos hacer unas casitas preciosas con sólo forrarlas de papeles de colores. La que hemos usado nosotros es una de té. Seguro que unas cuantas, de diferentes tamaños y colores, quedan chulísimas como decoración.

Using empty cardboard boxes you can create really nice little houses, with just a few decorated papers. We have used a tea box, for example. Definitely you can get a very nice village making several ones in different sizes and colors.


Pin It

22 January 2012

I got them!

From the very first moment I saw this post in Ishtar Olivera's blog I knew I had to order one, or more..., custom rubber stamps. I've been wishing to get one with Marabara's logo for a long time and, finally, I ordered it last Christmas, in this online shop. You just need to select the size and upload the image you want to have. In my case, it was quite straight forward, the logo, but there are so many other alternatives. Maybe drawings from your kids, signatures, names... endless possibilities.

The delivery took a couple of weeks to arrive. I got it this week and was looking forward to start playing with them right away. For the moment, I've made stickers, which I will use in my packaging.

It takes a few tests to get the feeling of the stamp and use the right position, amount of ink, etc... The first ones are, either outside the sticker ;) or incomplete... After a while it was fast and easy. I am so happy!!

I will try them also on the fabric labels. Let's see how they behave.


Desde el momento en que vi este post en el blog de Ishtar Olivera supe que tenía que pedir un sello personalizado, o más de uno... Llevo ya mucho tiempo deseando tener un sellito con el logo de Marabara y, por fin, lo pedí estas Navidades, en este sitio. Es muy sencillo, simplemente tienes que elegir el tamaño del sello y cargar la imagen que quieres. En mi caso lo tenía claro, el logo, pero hay infinitas posibilidades. Desde algún dibujo de los niños, firmas, nombres... podríamos seguir durante mucho rato.

El pedido ha tardado unas semanas en llegar pero al final está aquí. Recibí el paquete esta misma semana y estaba deseando probarlos. Para empezar he hecho pegatinas con el logo del fantasmita, que usaré en los envíos.

Lleva un rato acostumbrarse al sello, posición, presión, cantidad de tinta... Los primeros me han salido regular, algunos con parte del dibujo fuera de la pegatina, otros con trozos en blanco. Pero no hay que desesperar, enseguida se coge el tranquillo y a partir de ahí es coser y cantar. Además, si no quedan perfectos también tienen su encanto.

Voy a probarlos ahora para hacer las etiquetas de tela. Veremos a ver qué tal se me da.

18 January 2012

Feltia's Eco bags

A couple of months ago the first session of Hecho Por Mi was held, a day full of workshops and creativity. I was there, teaching how to make an Eco-bag. It was a fantastic group of people and we had a lot of fun. All the participants had to take some homework with them as we did not have time enough to complete the bag, we had so much fun... :)

Fátima was one of the participants and she's been so kind to send me some pictures of her finished Eco-bag and some others she made as Christmas presents. It's been really nice to see them! I love it! Thanks so much Fátima!!

Aren't these Eco-bags pretty?? I do think so!!
If anyone is interested to make one of these you can find the tutorial here. Of course, I'd be glad to receive some photos of the result. I love to see them!

By the way, Fátima has started up her own blog, Feltia, where she shows her beautiful creations. If you have some time do not hesitate to visit Fátima's blog.


Hace ya unos meses tuvo lugar la primera edición de Hecho Por Mi, una jornada llena de talleres y charlas. Yo participé impartiendo un taller, el de mi Eco-bag. Fue un grupo majísimo y nos lo pasamos fenomenal. Los participantes se llevaron tarea a casa, pues con tanta risa no nos dio tiempo a terminar la bolsa.

Fátima fue una de las participantes y ha tenido el detalle de mandarme fotos de su bolsa terminada y alguna otra más que ha hecho como regalo estas Navidades. ¡Me ha hecho muchísima ilusión Fátima! ¡¡Muchísimas gracias!!

Aquí os dejo un par de fotos, para que veáis lo bien que le han quedado y lo útiles que son. ¡No me digáis que no son bonitas! Si alguien se anima, aquí tenéis el tutorial. Y, por supuesto, yo encantada de recibir las fotos de vuestras bolsitas. ¡¡Me encanta verlas!!

Por cierto, Fátima ha empezado con su propio blog, Feltia, donde ya ha publicado algunas de las cosas tan chulas que hace con fieltro. Si tenéis un rato no dudéis en visitarlo.


16 December 2011

Packaging

I like to change the style of my packaging from time to time. I love any kind of stationery material and I enjoy like a kid playing with different kind of things, tissue paper, cardboard, satin ribbon, twine, or the famous washi tape...

This is the last style of packaging I am using. It is purely handmade, using cardboard and satin ribbons. I simply took a piece of cardboard, square or rectangular, depending on the needs, folded in half and made some holes with a paper punch, which I used to tie a string of satin ribbon.

You can include a small drawing to add some color and it is ready! Quick, simple, easy and very attractive.


Me gusta ir cambiando los envoltorios de vez en cuando. Siempre me han encantado las cosas de papelería y disfruto como una enana jugando con diferentes materiales, papel de seda, cartulina, cintas de raso para atar, cordel de bramante, la famosa washi tape...


Este es uno de los últimos envoltorios que me he inventado. Es muy sencillo y muy resultón. Solamente necesitas un trozo de cartulina, rectangular o cuadrado, dependiendo de lo que quieras envolver. Lo doblas por la mitad y haces unos agujeros con la ayuda de una perforadora, uno en cada uno de los lados, excepto en el doblado. Esos agujeritos nos servirán después para cerrar el envoltorio, atando unas cintas de raso, o de lo que más te guste, en forma de lazada, nudo... lo que se te ocurra.


Un pequeño dibujo para añadir algo de color y listo!


15 December 2011

Blue cloud

Since the package has already reached its destination, it was pretty quick I must say, I can already show you the surprise that I included. Actually you could already see it in one of the photos in the previous post...


To embellish the strap a little bit I created this brooch, using felt. It is a small cloud, in two different tones of blue. It couldn't be more simple but I think that it adds that little something to the bag, the final touch. I like how it looks in the strap but you can also wear it separately, if you wish.


Como el paquete ya ha llegado a su destino, realmente rápido por cierto, ya os puedo enseñar la sorpresa que añadí y que no quise mostrar el otro día. En realidad se veía en una de las fotos... ;)


Para adornar el asa y añadirle un toque especial hice este pequeño broche, en forma de nube. Está hecho de fieltro, en dos tonos diferentes de azul. No puede ser más sencillo pero me parece que alegra mucho el conjunto. Me encanta como queda en el asa y lo hice pensando en usarlo así, como una nubecita flotando por encima de la casa, pero, si se prefiere, también se puede llevar por separado. Cuestión de gustos.

23 October 2011

Thanks!

Hecho Por Mi was celebrated yesterday. A day full of creativity, with workshops and seminars all about the DIY movement.
I was there and enjoyed a lot the experience of teaching others the way to create your own Ecobag. We had fun!! A group of ten nice people, with the only aim of expending a nice time together, creating something.
Time flew and the two programmed hours were not enough to finish the bag completely so there is some homework to be done now by the participants. As I said yesterday I am fully available to answer questions. You can contact me anytime.
A big THANK YOU for being so nice and make me forget it was my first workshop. You made it easy!

I liked it that much that I would like to be involved in more workshops. I hope there are more opportunities in the future. I need to think about different possibilities...

It was also great to meet people in person. People I know from other blogs, people who follow my blog, or people involved in this DIY movement somehow. It was nice to meet you, really!
It was a pity that there was no room for everybody and some people could not join the workshop. There needs to be a next time!

PS: As soon as I have some time I will publish the tutorial I prepared for the workshop. I hope to get some pictures also...


Hecho Por Mi se celebró ayer. Un día lleno de creatividad, con talleres y charlas relacionadas con el movimiento DIY.
Yo estuve allí y disfruté muchísimo la experiencia de impartir un taller. Mi primer taller! Fue divertidísimo!! Un grupo de diez personas encantadoras, con el único propósito de pasarlo bien juntos, creando algo.
El tiempo pasó volando y las dos horas de taller se nos fueron en un suspiro y no nos dio tiempo a terminar la bolsa del todo. Así que los participantes tienen ahora deberes para terminarla en casa. Como ya dije ayer, para cualquier pregunta ya sabéis donde encontrarme.
Desde aquí MIL GRACIAS por ser tan majos y hacerme olvidar que era mi primer taller. Gracias por vuestra paciencia y por hacérmelo tan fácil!


Me gustó tanto que me he quedado con las ganas de hacer más. Espero que surja alguna otra oportunidad para impartir más talleres. Tengo que darle vueltas a algunas alternativas...


También fue genial poder conocer en persona a mucha gente que conocía a través de otros blogs, seguidores de mi blog, personas relacionadas con el mundo DIY de alguna manera. Me encantó conoceros, de verdad!
Fue una pena que no hubiera sitio para todos en el taller y algunas personas se quedaran sin plaza. Tiene que haber una próxima oportunidad!


PS: En cuanto tenga un ratito publicaré el turorial que hice para el taller. Y también espero conseguir algunas fotos del evento...

6 July 2011

Con bigotes y a lo loco

My daughter is quite interested about my blogging activity. She is really impressed with the whole process, I am writing in the blog, visiting other people's blogs, posting comments... She likes it, even though she also complains about my habit of taking photos all the time, or most of the time. This is specially critical when it comes to food related pictures. In those cases, the whole family complains ;-)

Coming back to her interest on the blogging world, many times, she is looking at my computer while I am surfing in the web. And she is getting ideas on her own. The other day she surprised me with this moustache. I remember we saw something similar in one blog or web page. Sorry, I do not remember where, otherwise I would mention the owner of this idea.

The fact is that she was inspired by the idea and put it into practice. I love it!


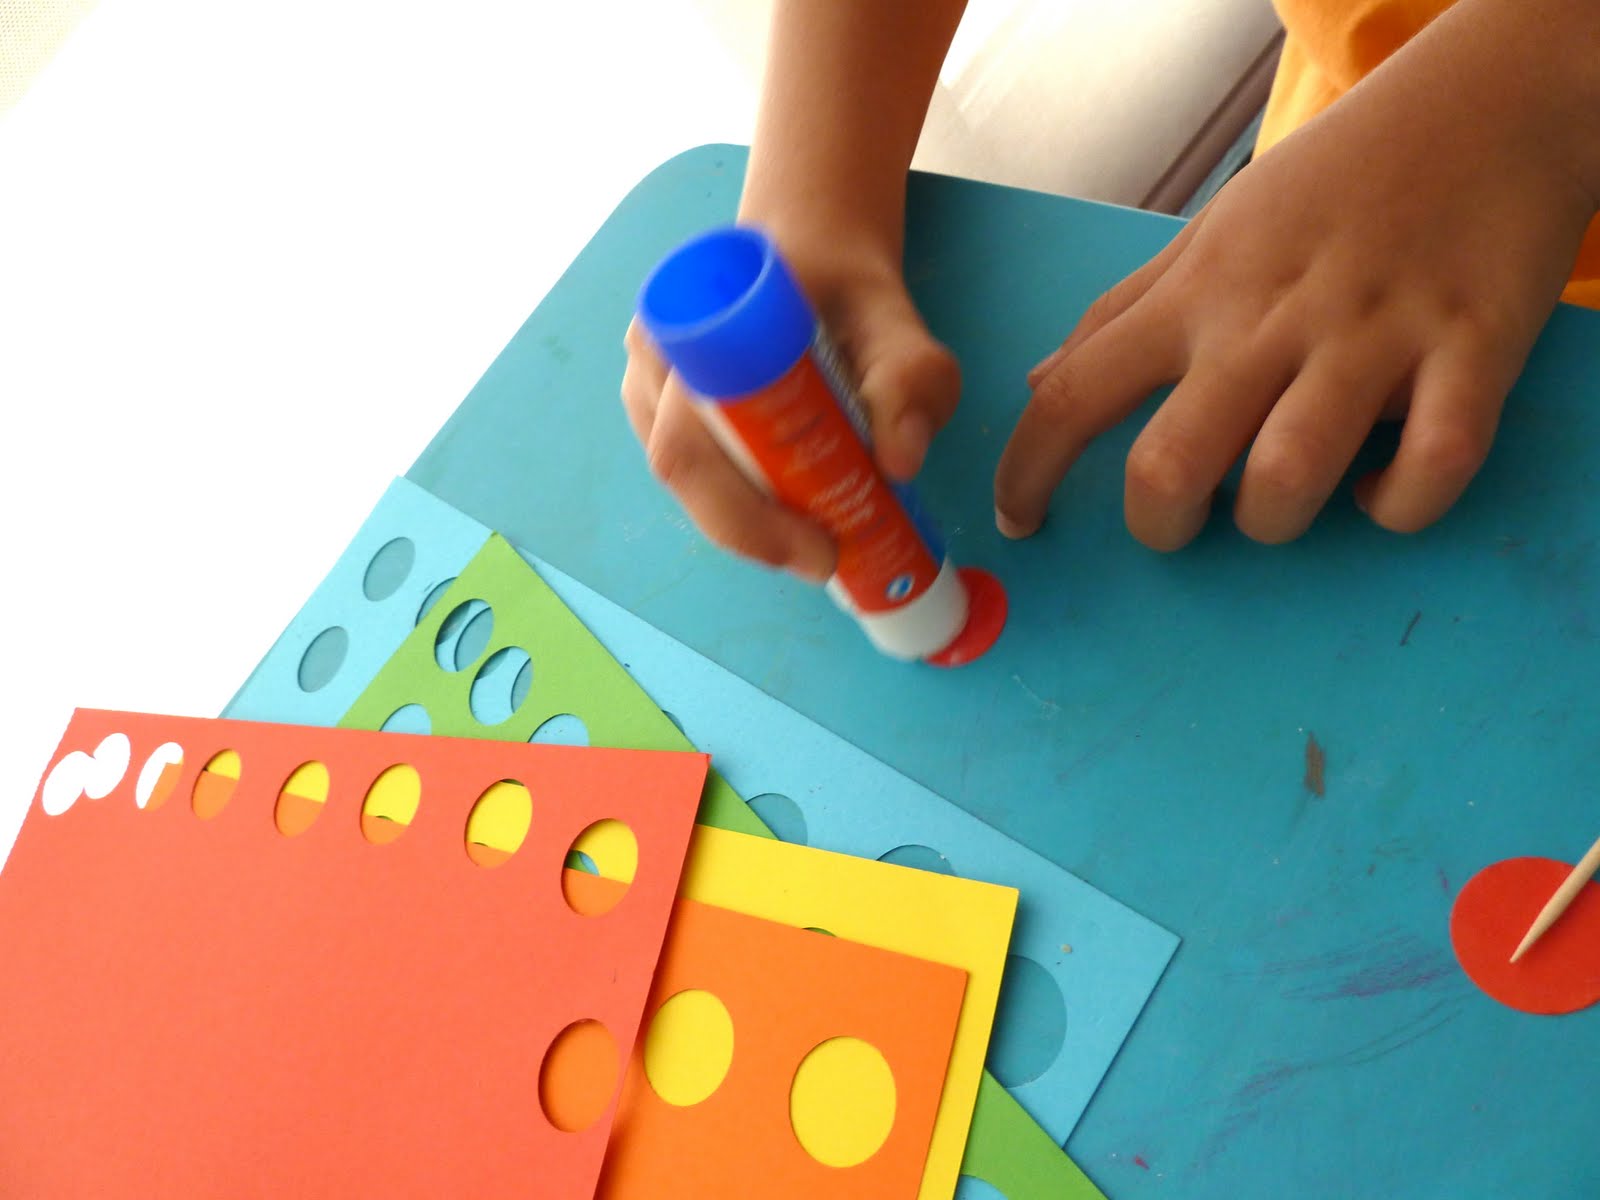
Based on this, I suggested to prepare some more and decorate some straws. I drew the moustaches and she did the rest. And here they are, funny and different straws to be used this summer with cool drinks.


Mi hija está bastante interesada en mi actividad bloguera. Le impresiona el conjunto en sí, el hecho de escribir las entradas en el blog, visitar otros blogs, poner comentarios... Le gusta mucho aunque también se queja a veces sobre mi costumbre de ir haciendo fotos de todo, o casi todo. Especialmente cuando se trata de fotos de comida. En este caso se queja la familia al completo ;-) . Soy la mamá plasta de la cámara de fotos...

Volviendo a su interés por los blogs, muchas veces pulula a mi alrededor cuando estoy en el ordenador, navegando por la red. Y lo curioso es que va cogiendo ideas. El otro día me sorprendió con este bigotillo que hizo ella misma. Recuerdo que vimos algo similar en algún blog o web. No recuerdo donde, lo siento, si no mencionaría al dueño de la idea original. Si en algún momento lo recuerdo o lo vuelvo a encontrar os lo enseñaré.


El caso es que, inspirada por esa idea, se puso manos a la obra y lo hizo en un momento. Me encanta!

Basándome en esta idea, le sugerí después preparar algunos bigotes más, en diferentes formas, y decorar unas pajitas. Yo hice los dibujos y ella el resto. Y aquí están, unas simpáticas y divertidas pajitas, que usaremos este verano con los refrescos.

26 June 2011

Decorated sticks

When your kids start claiming that they are boring it is good to have some easy activities they can do on their own and keep them busy for some time.

This afternoon my daughter was in the boring mood so I gave her the possibility of making decorated toothpicks to be used when preparing appetizers or desserts.


It is a really simple and funny activity which requires just a few "ingredients". You will only need:


- a craft punch. We used a circle one
- toothpicks
- a glue stick
- assorted color cardboard

The process couldn't be easier. Using the craft punch, make several circles. Glue them together, inserting the toothpick in between and you are ready!


Cuando los niños empiezan a repetir una y otra vez que están aburridos siempre es conveniente tener alguna actividad sencilla, que ellos mismos puedan hacer, y que les mantenga ocupados durante un buen rato.


Esta misma tarde mi hija estaba en modo "aburrido", así que se me ocurrió entretenerla haciendo palillos decorados, que luego usaremos para decorar aperitivos, postres o meriendas.


Es de lo más sencillo y solamente hacen falta unos pocos ingredientes:


- un troquel para papel. Nosotros hemos usado uno circular
- palillos
- cartulinas de colores
- pegamento en barra


Simplemente hay que cortar círculos con el troquel y pegarlos entre sí, con el palillo entre medias. Obtendrás unos divertidos palillos y los niños se entretendrán un buen ratito. Además, te puede servir para animarles a ayudar en la cocina cuando los vayas a usar ;-)

16 May 2011

Recycling fabric scraps: brooches

I have made this brooch using tiny little scraps. Just a few straps, twisted till they start curling, creating this flower-type forms.
I mixed scraps from the asian print used in one of the clutches that I showed in the previous post. Some scraps from the focus fabric as well as some scraps from the lining. Four or five straps were enough to create this one, which has a kind of a cloud form.

Once I had the little curly pieces I put them together and sewn to a brooch pin. So, here it is, a fabric brooch which is, for sure, one of a kind. There won't be another one like this. No matter how many you make they will always be different.


Hace poco hice este broche, usando trocitos muy pequeños de tela. Solamente necesité unas cuantas tiras, que retorcí muchas veces hasta que se rizaron sobre sí mismas, formando una especie de bolitas o flores.
He mezclado las telas que usé en uno de los bolsos de mano que os enseñé en el post anterior, tanto el estampado asiático del exterior como unos pedacitos rojos del forro. Cuatro o cinco tiras han sido suficientes para hacer este broche, que tiene forma de nube. Al menos a mí me recuerda a una nube.

Una vez que tuve las diferentes piezas, probé diferentes posiciones hasta que encontré la que me gustaba, las uní entre sí con unas puntadas y, finalmente, las cosí a un alfiler de broche. Y éste ha sido el resultado que, sin duda, es único. Seguro que no hay dos iguales. Incluso si usas las mismas telas de nuevo siempre quedarán diferentes.

29 April 2011

Creative hands: wall painting

I saw this video some months ago. And now that I started sharing with you the series of creative hands it is a very good moment to post about it.


I do not know exactly why but this video is somehow hypnotic. Maybe it is the music, or the painting as such,  or maybe both things together. The fact is that I have watched it many, many times and it is never boring.


I hope you enjoy it as well!


Vi este vídeo por primera vez hace ya unos meses. Y ahora que he empezado con la serie Creative hands es un buen momento para compartirlo.


No sé exactamente lo que es, pero este vídeo es hipnótico, al menos a mí me deja enganchada. Quizá es la música, o el proceso de pintar en sí, o ambas cosas combinadas. El caso es que lo he visto una y otra vez y nunca me canso.


Espero que también os guste!

25 April 2011

Recycling fabric scraps: ponytail holders

I have already mentioned that I keep every tiny piece of fabric, specially when I like the print. It is a pity to through them away, there is always a way to use those little scraps.

One example are these ponytail holders. They are made with a self-covered button, which embellish a simple rubber band. You can use either contrasting colors or, like in this case, combine the same tones. They will look great either way.


Ya he comentado antes que soy muy hormiguita con las telas y guardo hasta el más mínimo trocito, sobre todo cuando me gusta el estampado. Es una pena tirarlas a la basura y desperdiciarlas, siempre hay alguna forma de aprovecharlas y darles una segunda oportunidad.

Un ejemplo son estas gomas para el pelo. Están hechas con botones forrados con pequeños retales, adornando unas simples gomas elásticas. Las posibilidades son infinitas, se pueden usar colores en contraste o, como este caso, combinar los mismos tonos. Quedarán bien de cualquier manera.

17 April 2011

Creative hands: scrapbooking

The first time I heard about scrapbooking it was not so long time ago. I have not tried it myself. I will, for sure, in a near future. I am amazed about the things that people can create with just paper, glue, ink... so very few ingredients with fantastic results. Of course, creativity is one of the most important components here.

In this video you will see a scrapbooking project in real life. It is so interesting to see the whole process...


La primera vez que oí hablar sobre scrapbooking fue hace no mucho tiempo. No he hecho nada de momento pero algo caerá en alguna ocasión. Es increíble ver la cantidad de cosas que se pueden hacer con papel, algo de pegamento, tinta... solamente unos cuantos ingredientes con tan buenos resultados. Bueno, la creatividad es uno de los componentes fundamentales, claro.

En este vídeo podéis ver uno de estos proyectos en acción. Es interesantísimo ver el proceso completo. Al menos a mí me lo parece.

13 April 2011

Paper toys

Some time ago I got the link to Toy a day, a blog where you can find the templates to create little paper figures. There are figures for everyone, boys and girls, kids and adults... It is a good option to keep your hands busy for a while. 
You just need to download the template, print it and work on it.

Hace ya un tiempo alguien me pasó el link de Toy a day, un blog donde encontraréis plantillas para hacer figuritas de papel, con un montón de opciones diferentes. Hay para todos los gustos, para grandes y pequeños... Es una buena alternativa para pasar un rato entretenido.
Solamente tienes que descargarte la plantilla, imprimirla y en marcha.

Some examples:
Algunos ejemplos:


7 April 2011

Creative hands: handmade notebooks

I love to see how other people work and create their products. It is so inspiring and nice to see the entire process, how the raw material is transformed into something beautiful, that I cannot stop watching and watching this kind of videos.


Today I will share one of them, which I discovered this morning through Artesanio. It belongs to Flo Garriga, who makes lovely notebooks, using fabrics to cover them. You can find more in her blog, Trapitos al sol.


Siempre me ha gustado ver como trabajan los artistas y como crean sus productos. Es impresionante y muy inspirador ver el proceso completo, y como de una hoja de papel o un trozo de tela sale algo bonito. Me gusta tanto que no me canso de ver este tipo de vídeos una y otra vez.

Hoy quiero compartir con vosotros uno de ellos, que he descubierto a través de Artesanio. Pertenece a Flo Garriga, que hace unos cuadernos preciosos, forrados de tela. Podéis ver más sobre su trabajo en su blog, Trapitos al sol.

Volveré con más vídeos sobre trabajos manuales, según los vaya descubriendo.
Pin It
Related Posts Plugin for WordPress, Blogger...